Hard Drive Replacement – Where to replace the HD?
🔍💻 In this guide, you'll learn how to diagnose and resolve common hard drive (HDD/SSD) issues and how to replace them step-by-step on notebooks and PCs. Follow the steps and verify the results after each replacement.
Replacing a new notebook hard drive – When to change a laptop hard drive?
📌 Before you begin: • 💾 Back up your data (if the device still turns on). • ⚡ Turn off and unplug the device. • 🖐️ Discharge static electricity (ESD) by touching a metal surface. • 🛡️ Check the manufacturer's warranty: Opening the device may void it.
🔍 Signs that you need to replace your disk: strange noises, bad sectors, very slow startup, frequent errors, blue screens, or inability to boot the system. To keep your data safe, schedule backups. security on an external drive or memory flash. An SSD can significantly improve the performance and efficiency.
Backup – Possibility to recover data on HDD SSD notebook
💡 If your HDD works but you want change to a faster model or larger capacity, perform a clone to keep partitions and content intact.
🛠️ If the disk fails but is still readable, try to recover data with data recovery tools. software before replacement. After removing the cover and disconnecting the HDD, you can use a USB adapter to connect the disk to another computer and copy the information. 🆘 If there are loud noises, prior impacts, a burning smell, or encryption, go to a trusted technical service to avoid aggravating the physical damage.
Installing operating system and programs
🧭 Recommended steps after installing the new operating system: 1️⃣ 🔍 Activate and validate your system license. 2️⃣ 💡 Install the manufacturer's drivers and verify updates pending. 3️⃣ 🛠️ Restore your files from backup. 4️⃣ 📊 Check disk health and temperatures. ℹ️ Keep licenses for your applications at hand. Choose Windows, macOS, or Linux Depending on your device's compatibility. If you're using consoles (e.g., PS4), follow the manufacturer's official guidelines for HDD replacement and formatting.
HDD hard drive type
Mechanical HDDs are still useful due to their cost per GB and good capacity for storing large volumes of data. Before purchasing, confirm compatibility with your laptop or PC and check speed (rpm) and cache.
Portable SATA hard drive – 2.5″ mechanical hard disk 5400rpm

500GB or 1TB HDDs are common sizes for mechanical drives. 💾
These models offer a good balance between price and performance. Consider cache and rpm depending on your usage. In range low, the cost/GB is usually favorable. Combine them with a solid disk for the system (and leaves the SSD to speed up the start).
Portable solid state drive – Hard Disk SSD 2.5″ solid state

The 2.5″ SATA SSD is ideal for revitalizing a laptop. 🛠️
The capacity can match that of an HDD, but with better response and lower power consumption. Consider 250–500 GB for the system and apps, or 1 TB if you're working with heavy projects. These SSDs use SATA 3 and are compatible with computers that still have SATA 2 (which operate at a slower speed).
Laptop SSD hard drive – M.2 type SSD
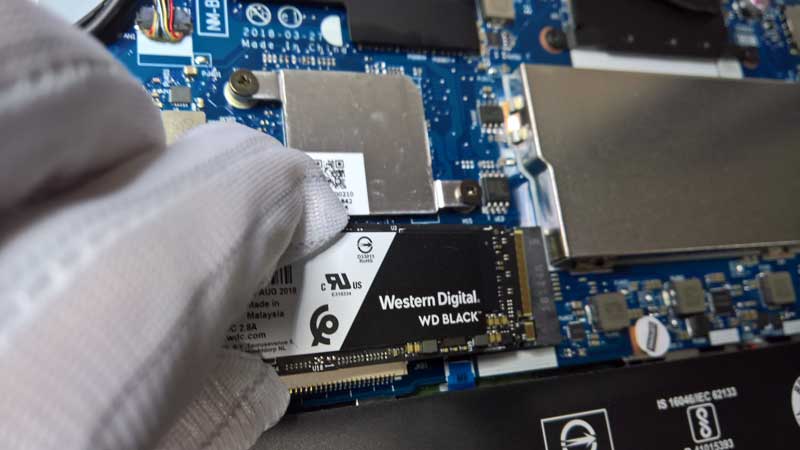
Confirm that your motherboard have an M.2 slot and the correct format (NVMe or SATA). They are secured with one screw and require size compatibility (2242/2260/2280). Check the specifications and, if unsure, refer to your computer's manual.
The most common formats:
M.2 NVMe Pci-E using the speed of the 3rd gen pci express port.
- Average sequential read speed: Up to 3,400 MB/s
- Average sequential write speed: Up to 1,500 MB/s
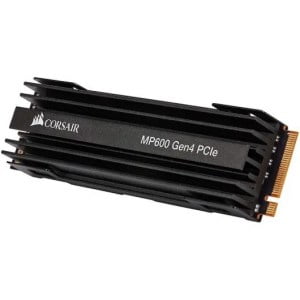
4th generation M.2 NVMe Pci-E disk

- Reading speed: up to 4950 MB/s
- Writing speed: up to 4250 MB/s
The SSD disks NVMe PCIe 4.0 offers higher bandwidth and requires good ventilation; consider heatsinks to avoid thermal throttling.
M.2 sata slower and cheaper – Change the Hard Drive

- Reading speed: 560 MB/s
- Recording speed: 510 MB/s
There are many different speeds depending on the brand and model. M.2 SATA drives perform similarly to 2.5" SATA SSDs, but save space in compact systems.
When changing the hard drive – Change Hard Disk:
To protect your personal data, keep the damaged disk under your control or securely destroy it if you won't be reusing it. The total process time depends on the disk stock, the volume of data to be cloned, and the performance of your computer.
- Quick Checklist: Check compatibility (SATA/NVMe, M.2 size), capacity, and warranty. ✅
- Plan: Decide whether you will perform cloning or a clean install of the system. 💾
- Basic tools: Suitable screwdriver, thermal paste/pad if applicable, USB–SATA/NVMe adapter for cloning. 🧰
- Good practices: Prevents ESD, works without power, and documents screws/positions. ⚡🖐️
- Evidence: After installation, run SMART diagnostics and update firmware/BIOS if necessary. 📊
- When to see a technician: Physical damage, stripped screws, broken connectors, critical data, or compatibility issues. 🆘🔧
- Payment/Purchase Methods: Not applicable to this DIY guide; focus on compatibility and a secure process. ℹ️
- Aim: that the replacement is safe, reproducible, and with minimal risk to your data. 🛡️


