Replacing the Notebook Keyboard
Keyboard Replacement – Notebook Keyboard Replacement
🔍💻 In this guide, you'll learn how to diagnose and resolve keyboard issues on your laptop: unresponsive keys, keys that activate automatically, keys that are stiff or missing, or keys that are damaged by liquids. Follow the steps and check the results after each change.
Notebook keyboard repair
This DIY guide helps you identify if you need to replace your keyboard and how to do it safely. Check for symptoms such as unresponsive keys, unintentional repeat, or dead spots. If the problem arises after spills, consider that a full replacement is usually necessary.
The keyboard by the way is the most used component of any notebook.
The difficulty of the change varies greatly depending on the model. In some laptops Access is achieved with just a few screws; in others, a large part of the equipment must be disassembled. Before starting, identify the exact model and look for the exploded view.
This guide is valid for notebooks of multiple brands and common series:
- Acer
- Asus
- Lenovo ideapad, thinkpad
- Dell XPS, Inspiron
- Toshiba Satellite, portege,
- Sony, Vaio
- Compaq,
- Packard Bell,
- Hp,
- Models of Macbook
In many cases, the failure of some keys requires replacing the entire keyboard to ensure stable operation.
Most common reasons why you need to replace your notebook keyboard:
- loose key breakage
- loss of keys
- damaged key membrane
- waterfall
- Spilled beer or other liquids
- falling heavy objects
📌 Before you begin:
• 💾 Make a backup if the computer turns on.
• ⚡ Turn off and unplug the device; remove the battery if it is removable.
• 🖐️ Discharge your static electricity (ESD) by touching a metal surface or wearing an anti-static wrist strap.
• 🛡️ Check warranty conditions: opening the device may void it.
Average cost of keyboard replacement
Costs and times vary by model. As a reference for your DIY project, determine if your equipment allows for changing only the keyboard or if you need to replace the entire top case of the notebookThis affects the complexity of the work and the materials needed.
Keyboards without complete disassembly

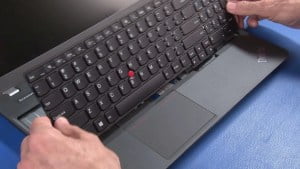
In previous generation notebooks, the keyboard module is usually mounted on the top case and is released by removing 2–3 screws at the base and gently prying on the top anchors.
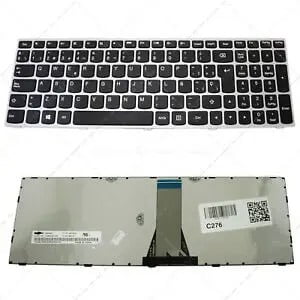
For example, in a Lenovo G50-70 The change is simple: remove three screws from the bottom case and carefully remove the keyboard.

Suggested steps (generic example) 🔧:
1️⃣ 🔍 Remove the bottom screws identified by the keyboard icon (if applicable).
2️⃣ 💡 Release the upper lashes with a plastic tool, without forcing.
3️⃣ 🛠️ Lift the keyboard from the top edge and No pull the flex: open the ZIF connector lock and disconnect.
4️⃣ ✅ Place the new keyboard, connect the flex (secure the tab), seat the keyboard and screw.
Note: For backlit models, please confirm connector and cable compatibility before mounting.
Keyboard Replacement – Keyboard replacement with complete disassembly

In the notebooks Newer models require removing the motherboard, internal battery, storage, and peripherals to access the keyboard or the top case with integrated keyboard. This increases the complexity of the procedure.


General steps 🛠️:
1️⃣ 🔍 Document the order of screws and cables (photos help).
2️⃣ 💡 Disconnect the internal battery before handling the board (if accessible).
3️⃣ 🛠️ Remove the motherboard, speakers, and brackets securing the keyboard; loosen any plastic rivets.
4️⃣ ✅ Install the new keyboard or palm rest with integrated keyboard; reconnect the flex cable and assemble it in reverse order.
🆘 When to go to a trusted technician: if there are rivets to melt/rivet, welds, risk of breaking flex cables, presence of an internal battery glued or if you do not feel comfortable with the level of disassembly.
ℹ️ Language support: If your laptop has an English, French, Italian, German, Spanish or other keyboard, replace it with one of the following: same original language to match labels and frame fit.
Replacing the keyboard with the upper casing
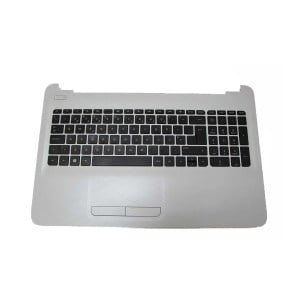
In teams of range If the display is high-resolution and backlit, the manufacturer may recommend replacing the entire assembly (palm rest + keyboard + touchpad). This simplifies installation but makes the replacement more expensive and requires more disassembly.
To repair the keyboard, it will be necessary to replace the top of the portable with the wrist rest (Palm Rest) and the trackpad (touchpad).
Perform a final test: Check the backlight (if applicable), caps lock, brightness, and all function keys before closing completely.
How long does it take to change the keyboard?

Repair time
DIY time estimate: Simple models with removable modules can take 20–45 min; fully disassembled models, 1–3 h depending on experience. Allow additional time to identify part number of the spare part if necessary.
In most cases, with the spare part on hand, you can complete it in one organized work session 🕒.

Warranty
Please note: Opening your device may affect your manufacturer's warranty. Most do not cover liquid damage or mechanical failure. keys. Document the process with photos to facilitate future maintenance.
🆘 If the problem persists, if there's a burning smell, short circuits due to leaks, or you're not comfortable disassembling it, contact a trusted service center. In the meantime, you can use an external USB keyboard as a temporary solution.
Helpful tips for a successful keyboard swap
- Plan. It includes precision screwdrivers, a plastic tool, an ESD wrist strap, and a compatible replacement part.
- Order. Use a magnetic mat or screw spacers in stages.
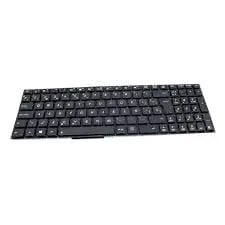
- Compatibility. Check layout and keyboard language before mounting it.
- Evidence. Before closing, test all keys and backlighting.
- CautionAvoid forcing tabs; if there's resistance, check for any hidden screws.
- Payment/PurchaseIf you purchase spare parts, please retain the invoice and packaging for exchanges if the replacement is not compatible.
- More resources. Check out guides and related topics on the site for adapt to your specific model.
Where can I change my keyboard?
If you prefer not to perform the procedure, find a trusted technician in your area and ask them to respect the original language/layout of the keyboard and flex cables. Bring the part number noted and asks for functional tests when removing the equipment.
See also this related guide: Notebook hinge repair.
¿://techtutor.mastertrend.info/cambio-conector-de-corriente/» target=»_blank» rel=»noopener»>Click here!

RESOURCES AND ESTIMATED TIMES
Materials checklist and guidance for your DIY project
| # | DIY Task | Time |
|---|---|---|
| 1 | Dust cleaning and thermal paste replacement (preventive improvement) | 30–60 min |
| 2 | Model identification and part number from the keyboard | 10–20 min |
| 3 | System scan and basic backups | 15–30 min |
| 4 | Prior data rescue if there is a risk of liquids | Variable |
Is your computer freezing? Try these DIY solutions first.
Power down and unplug ⚡, use a temporary USB keyboard, check drivers, and follow the steps in this guide. If the issue persists or there's liquid damage, seek a trusted technician.


